Blog
WFM Dashboards - Getting Started 100%
Getting Started
Welcome to Dashboard Insights!
We’re excited to have you explore the Dashboard Insights WFM Dashboards.
Whether you're diving in for the first time or looking for a quick refresh, this guide is designed to walk you through every step of setting up and using your dashboards effectively.
Here, we’ll share insights, tips, and tricks to ensure you get the most out of your WFM Dashboards experience.
In this guide, we’ll cover:
- Step 1: Exploring the Dashboard Insights Homepage
- Step 2: Navigating dashboard reports and utilizing filters
- Step 3: Updating your profile settings
- Step 4: Accessing support
Let's get started!
Step 1: Explore the Dashboard Insights Homepage
If you're new to Dashboard Insights, you're in the right place.
Let’s start with a quick overview to get you familiar with the layout.
Access your dashboards
Navigate to the “Dashboards” tab after logging in.
On the Dashboard page, click the “WorkflowMax Dashboards”
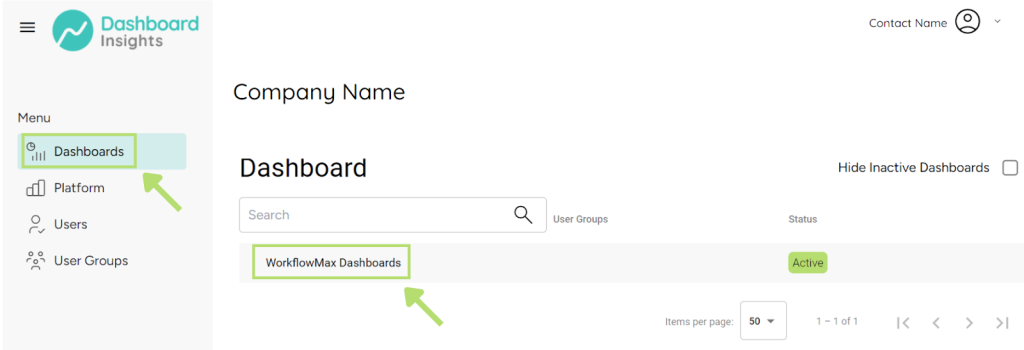
This is your dashboards center, where all your WFM data comes to life.
Here, you'll find a comprehensive overview of your different dashboards, providing visibility to Billing, Job, WIP, and more!

Head over this link to navigate your dashboard reports and filters.
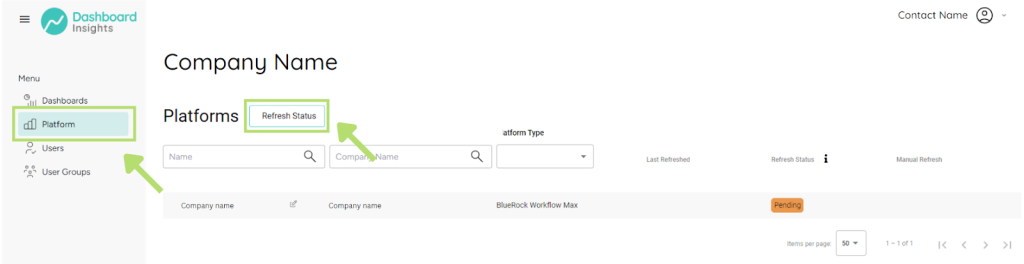
View your platforms
To view your platforms, click on the “Platforms” tab.
To ensure your platform list is up-to-date, click “Refresh Status”.
This ensures any changes or updates are reflected accurately on your dashboard.
View and add users
For user management, head over to the “Users” tab.
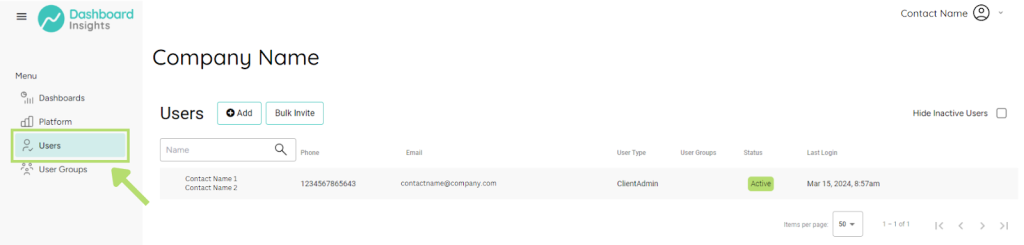
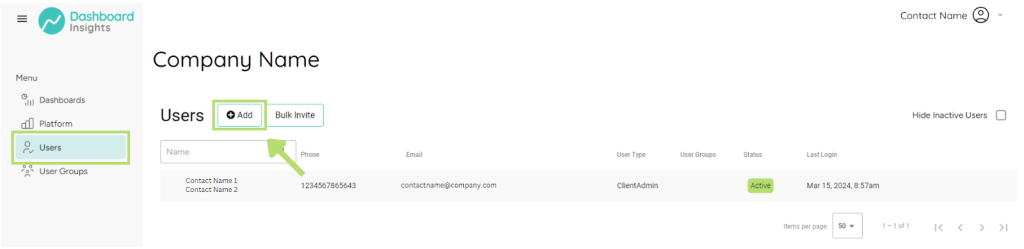
You can add new users individually or in bulk.
To do this, simply click the “Add” button.
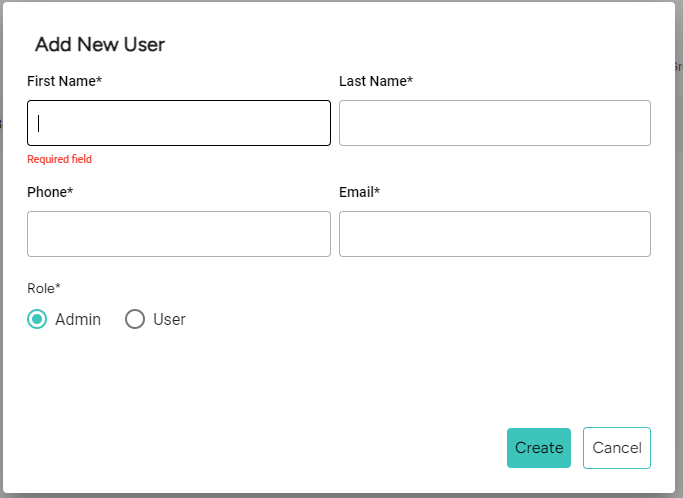
Enter the user’s first name, last name, phone number, email, and role to grant access for the dashboards.
This ensures that the right people have the right access to the relevant dashboards.
Click “Create”.
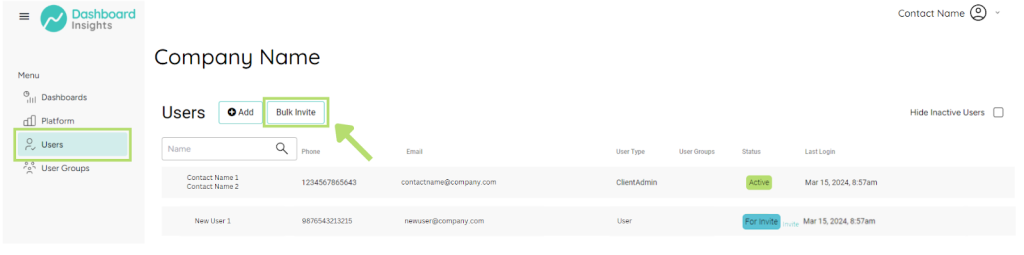
New user will be visible in the user list.
Click “Invite” to trigger Dashboard Insights registration instructions to new user via email.
Users who successfully registered will show as “Active”.

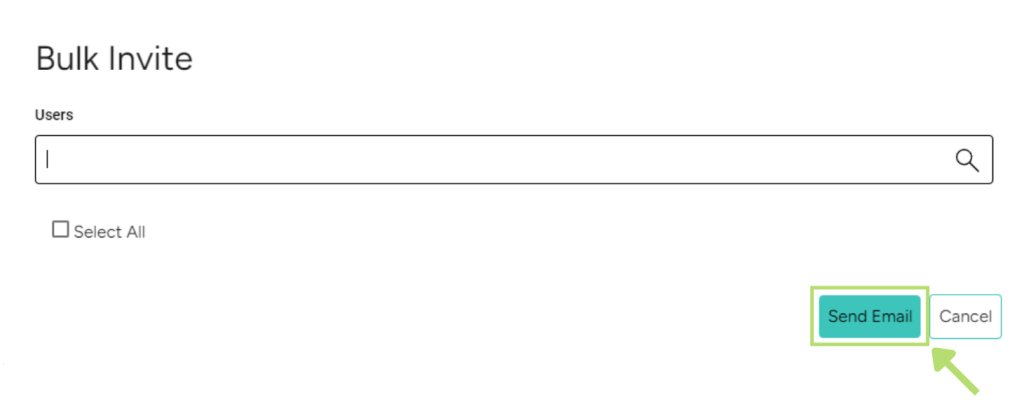
To invite new users in Bulk, click “Bulk Invite” and select the multiple users you want to send registration instructions to via email.
Click “Send Email” to trigger bulk invites.
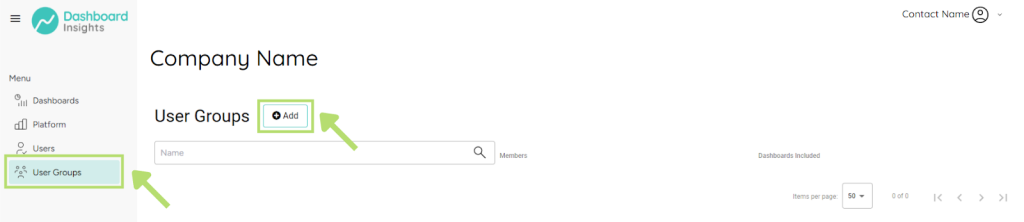
View and add user groups
In the “User Groups” tab, you can organize users into groups.
This is especially useful for limiting access to certain dashboards based on user roles, enhancing both security and efficiency.
To add a User Group, click “Add”.
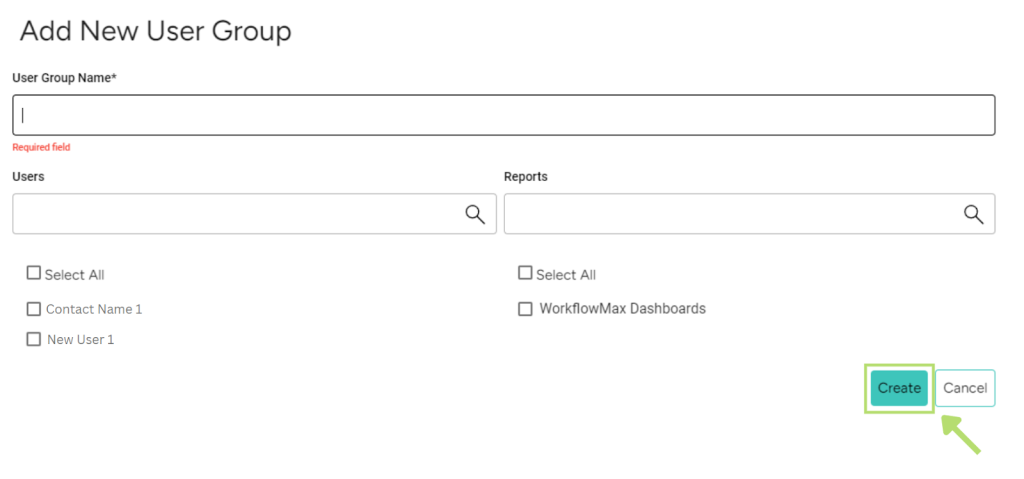
Input a Group Name for this User Group.
Tick the checkboxes of the users included in the group.
Tick the checkboxes for the Dashboards that the selected users will have access to.
Click Create.
Step 2: Navigate Dashboard Reports and Filters
Now, let’s dive into the dashboard reports.
Each report offers visibility of metrics and data-driven insights into various aspects of your business operations and management:
- Billing
- Profitability
- Job
- Team Member
- WIP
- Data Integrity
Utilize filters
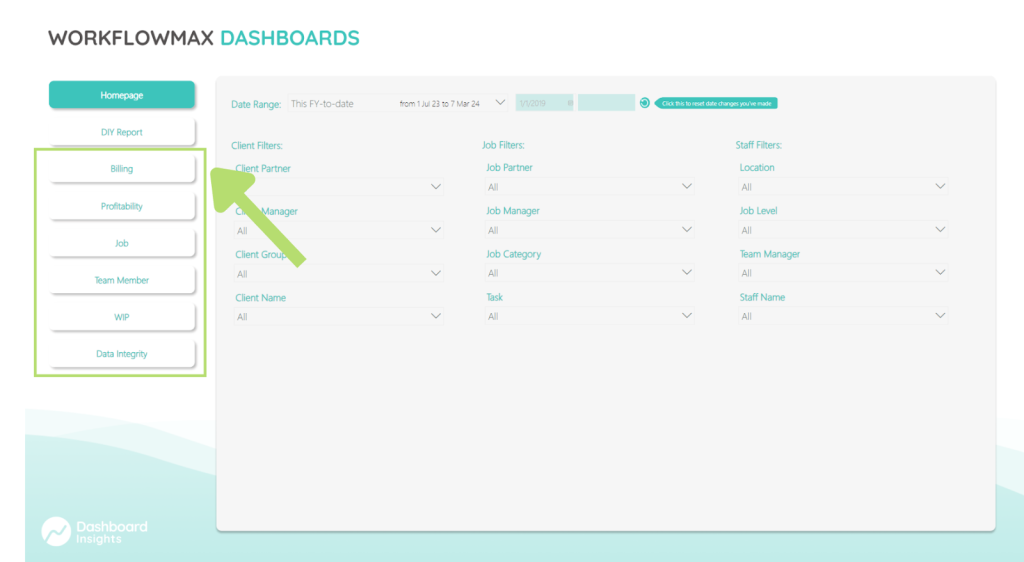
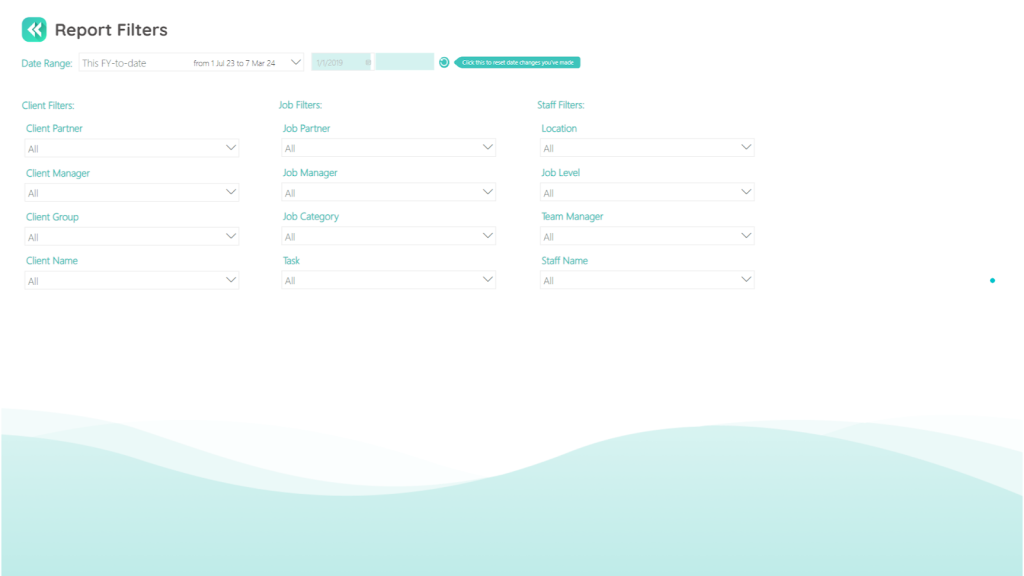
To get started, navigate to the homepage of the reports section.
In this section, you can set your preferred filters for the reports you want to see.
You can filter by date range, client details, job specifics, and staff attributes.
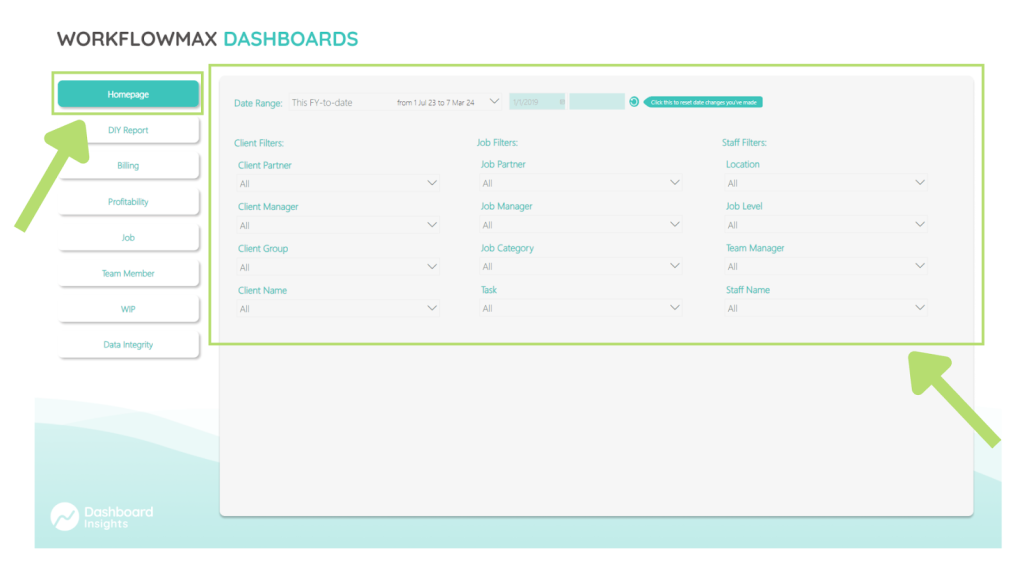
This allows for precise tailoring of information based on the criteria most relevant to your needs.
For instance, to filter by client, select options like Client Partner, Client Manager, Client Group, or Client Name.
Similarly, job and staff filters can be adjusted to refine your data further.
Maximize the Report Filters to your advantage by drilling down on the specific attributes you want to reflect on your dashboards.
Navigate each dashboard
To begin navigating your dashboards, head over to the left-hand menu on the main screen.
This menu is your gateway to different dashboards with different data and reports for your needs.
Select the dashboard you want to view.
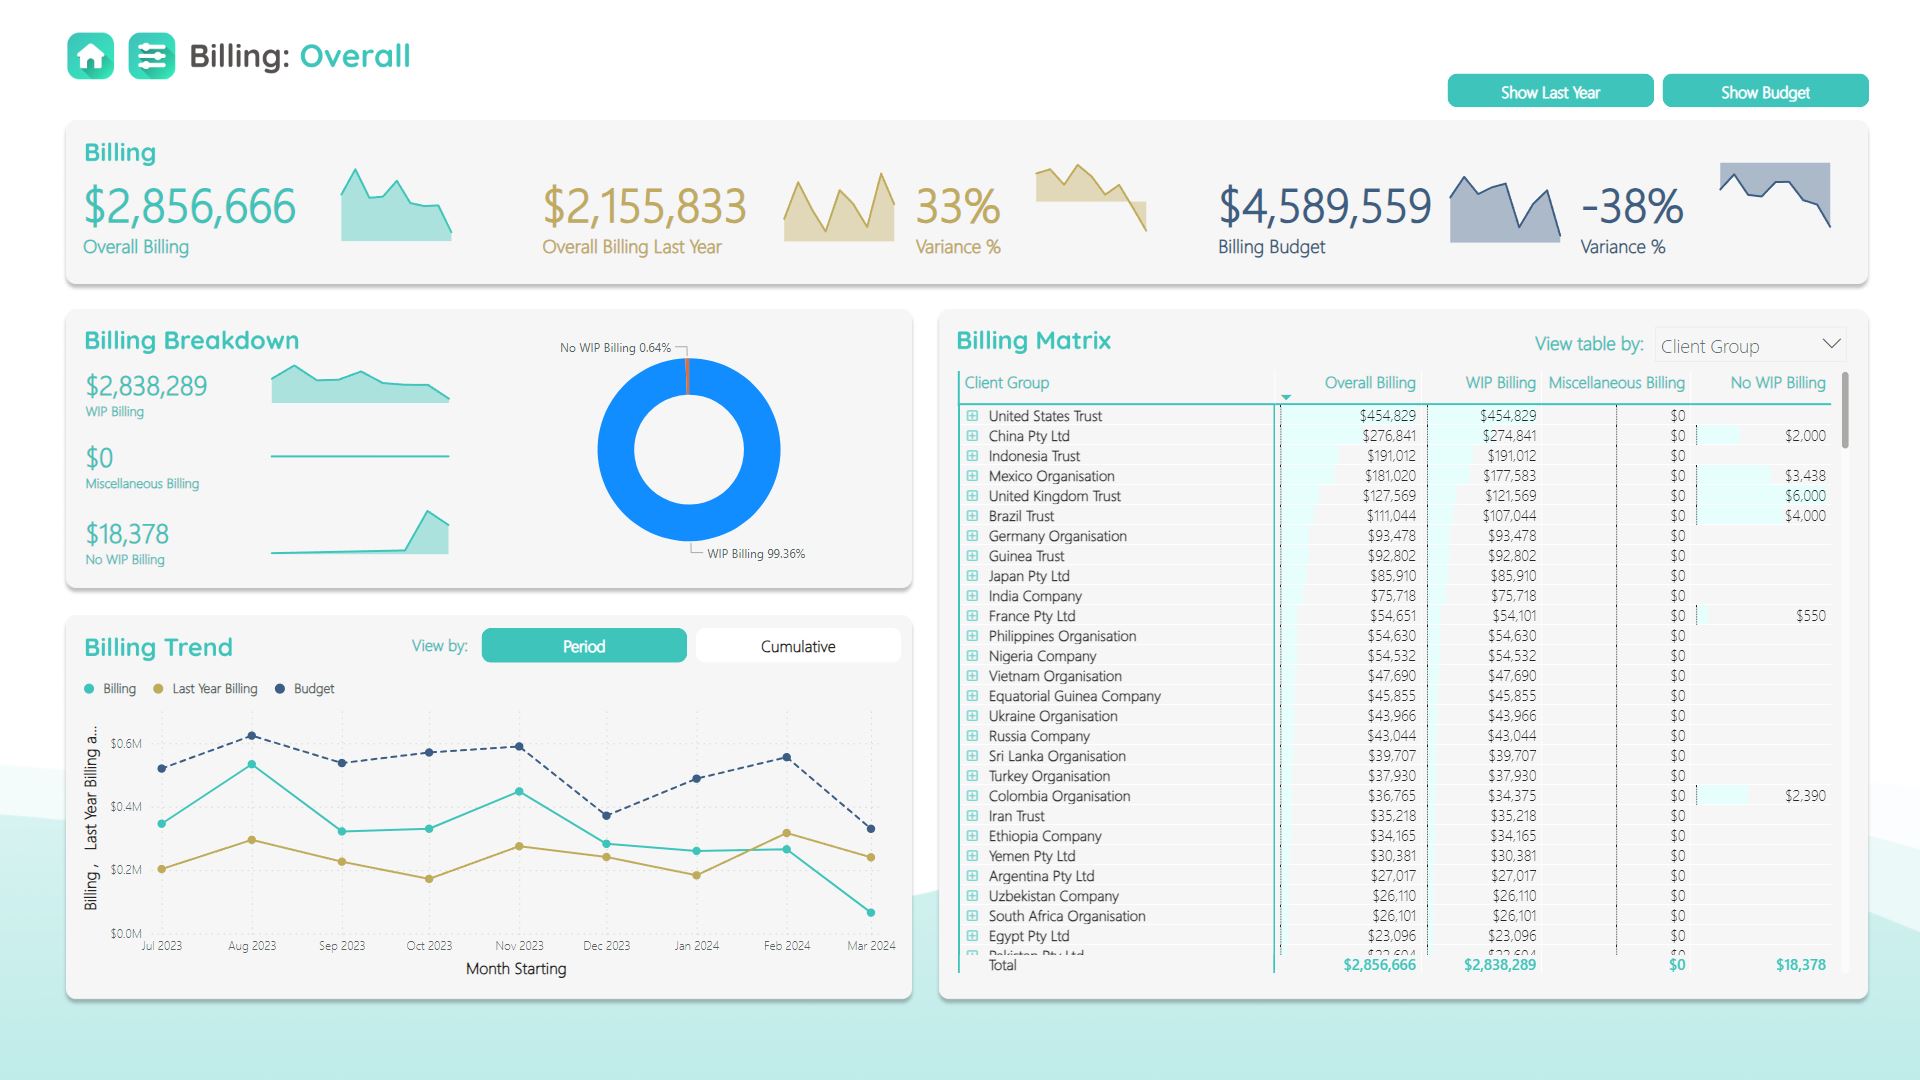
As an example, here is what the Billing dashboard looks like.
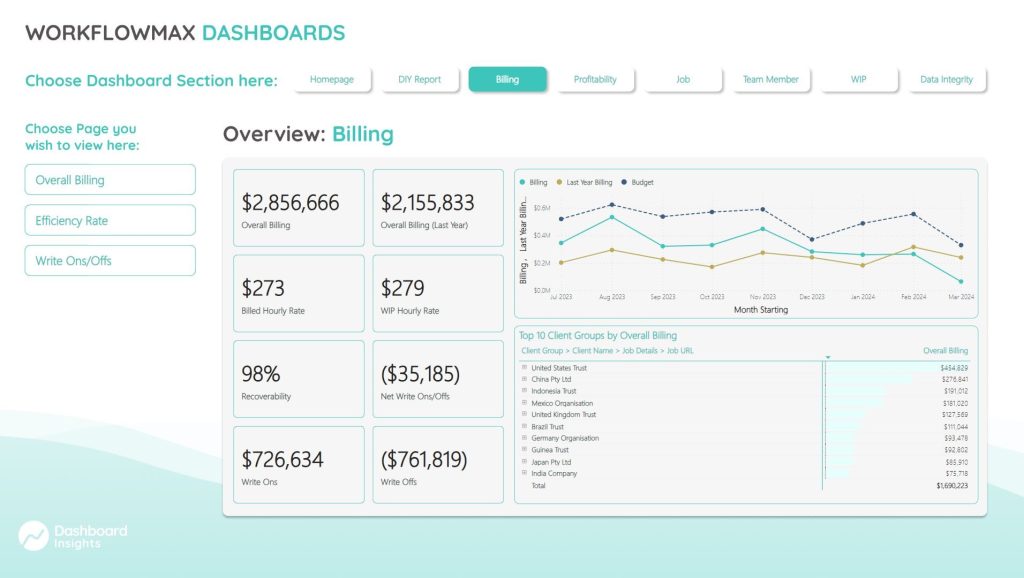
The Billing dashboard is a powerful tool for managing your financial data and gaining insights into your business' billing health.
To access more detailed reports, begin by selecting the specific billing data you wish to see on the left-hand side of your screen.
For example, this is what the Overall Billing looks like.
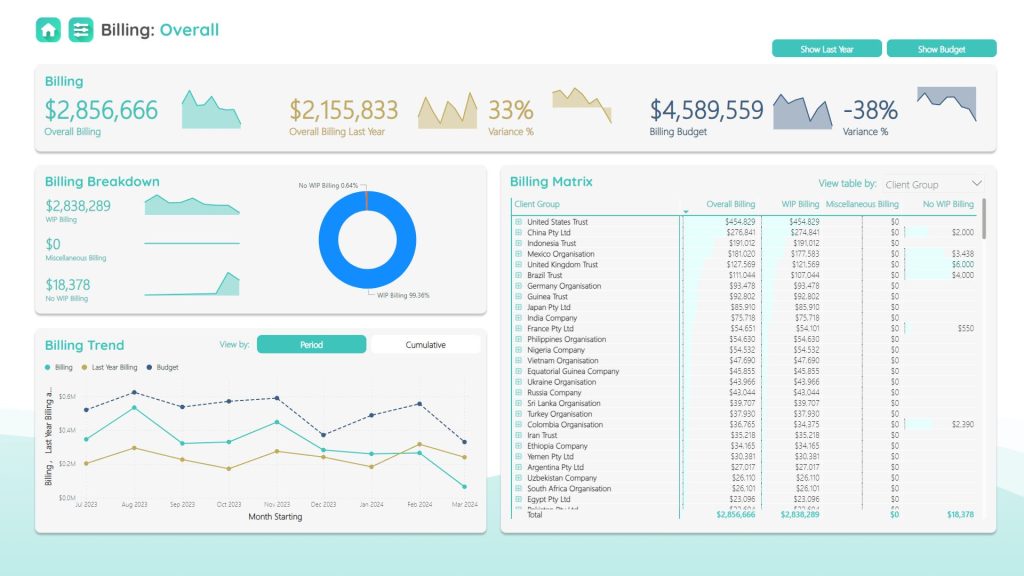
From this page, you can further filter the data by clicking the filter icon on the top-left corner of your screen.
Similar to the WFM Dashboard Homepage, you can filter by date range, client details, job specifics, and staff attributes.
Master navigating your dashboards by clicking through the other pages and reports your WFM Dashboards are packed with!
Step 3: Update Profile Settings
Keeping your profile updated is essential for us to stay in touch and for your team to recognise you.
Here's how to keep your profile current:
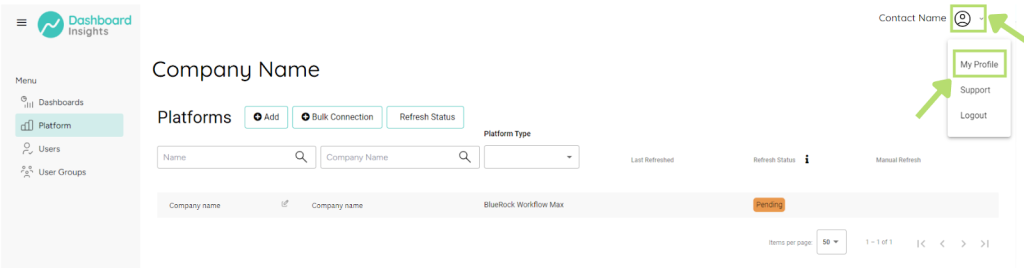
On the top right corner of your screen, click the dropdown button and select "My Profile."
Once on the "My Profile" page, you'll see fields for your personal details.
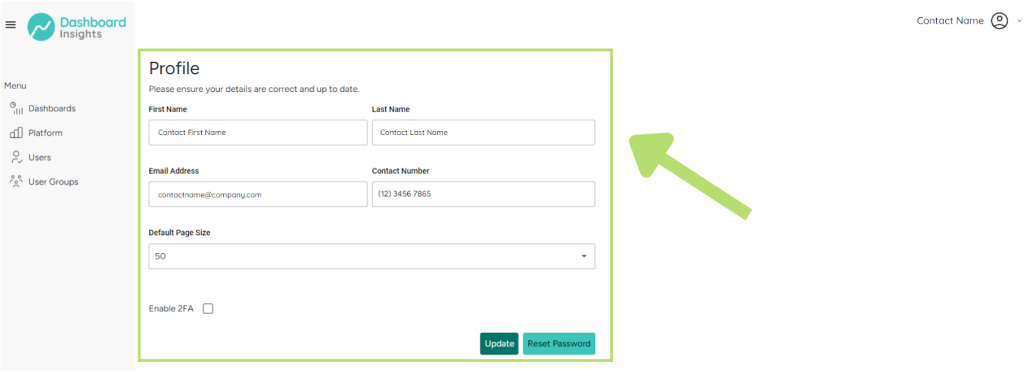
Let's walk through updating each section:
Enter your First Name and Last Name as you'd like them to appear to other users on the dashboard.
Provide your Email Address as this is crucial for receiving notifications and updates.
Input your Contact Number to enable a direct line of communication when necessary.
Choose your Default Page Size from the dropdown to determine how many entries you'll see per page on your platform.
For an additional layer of security, check the box to Enable 2FA (Two-Factor Authentication) and follow the prompts as suggested on your screen.
After you've entered all your information, hit the "Update" button to save your changes.
If you need to change your password, simply click "Reset Password."
Keeping your profile updated is key to a personalized and secure experience with WFM Dashboards.
Step 4: Access Support
Feeling stuck or just have a query?
Don't worry, the Dashboard Insights support team is on standby to help you out.
Here's how to reach out for help:
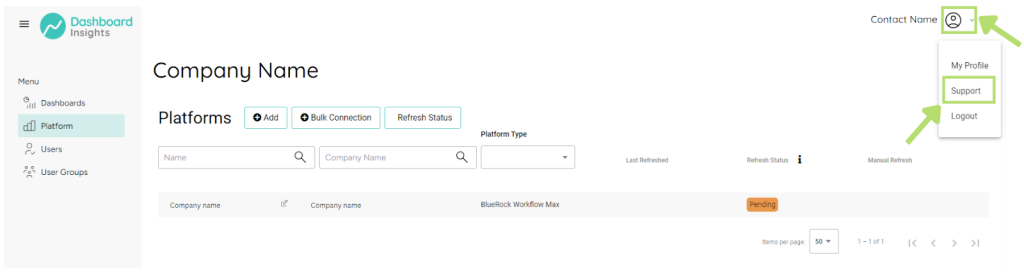
Head over to the top right corner of your screen and select “ Support”.
On the "Support" page, you'll find a straightforward form to guide you through submitting a support request:
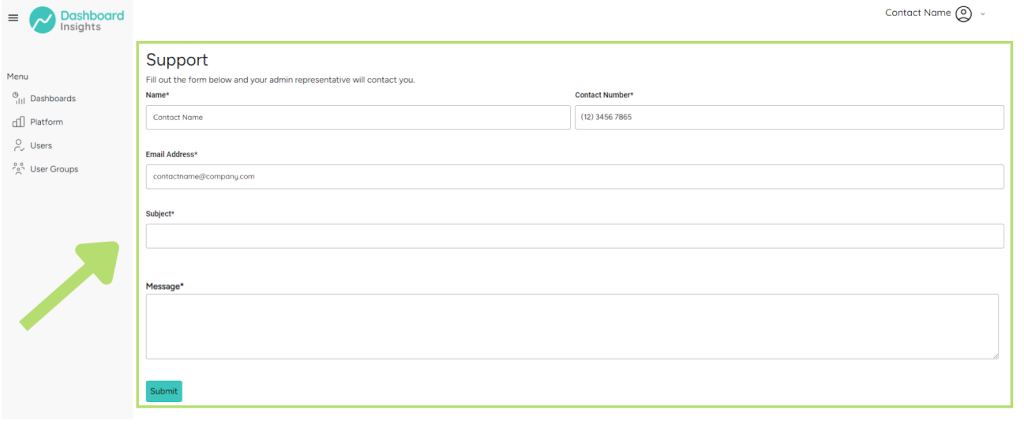
Input the Subject of your enquiry to give us a quick heads-up on what you need help with.
Next, describe what’s on your mind in the Message field.
The more details you provide, the better we can tailor the assistance to your needs.
Prefer to reach out directly via email?
Drop a line at support@dashboardinsights.com for any further questions or concerns.
Need guidance on how to cancel your service or update billing details?
Also direct those emails to support@dashboardinsights.com and we will get you the personalized help you need.
Congratulations!
You’re now ready to fully utilize the WFM Dashboards.
Dive in, explore, and optimize your business operations like never before.